
Doctor Who DIY Christmas Tree: See It to Believe It! Step-by-Step Instructions
Feast on your eyes on this Amazing Doctor Who DIY Christmas Tree for Less Than $50! Here’s the Step-by-Step Instructions to created it… Here’s the Step-by-Step Instructions to create it and the entire process detailed…
This was a passion project that I decided in September that I wanted to attempt. I looked around online, saw a few other attempts, then decided to make my very own Doctor Who tree. If I had an unlimited budget, it would have been easy enough to drop big bucks and buy Who lights and ornaments, but I’m both crafty and cheap, so I decided to DIY my tree for as little as possible. I spent right at $50, not counting the cost of the tree and am very pleased.
My son is 12 and an absolute die-hard Doctor Who fanatic. As a result, I have seen every episode multiple times and have an affinity for bow ties that otherwise cannot be explained. I created this tree for him to celebrate his last year as “kid” before he hits his teen years. In other words, this was my last-ditch efforts to be a cool mom before puberty takes him away from me.
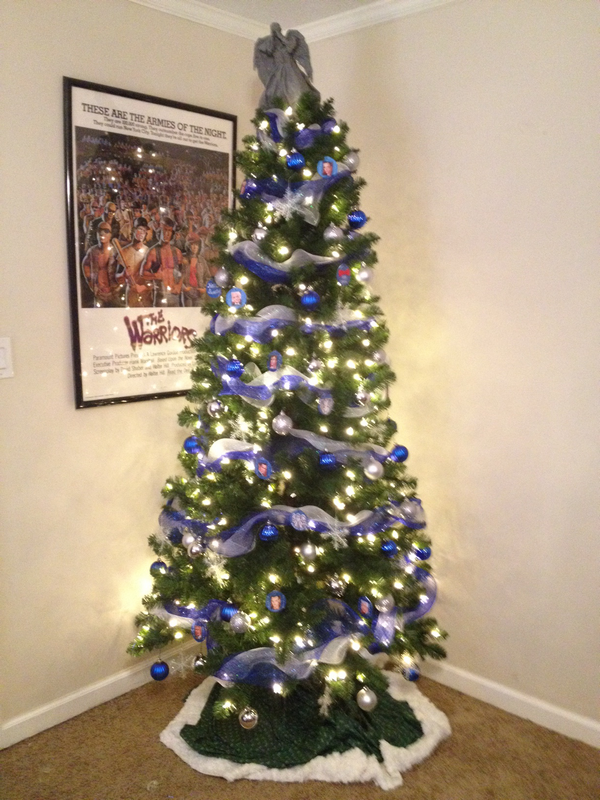
One of the best things about Doctor Who is the annual Christmas special. Even if you don’t watch the regular season shows, this is a great one to watch with the family. I wanted my tree to be a celebration of that sense. To me, that meant lots of blue, lots of white, lots of Doctors. I made handmade ornaments, a Weeping Angel to top the tree and then found store bought that complimented to round it out. Here’s a look at what I made and how I made it.
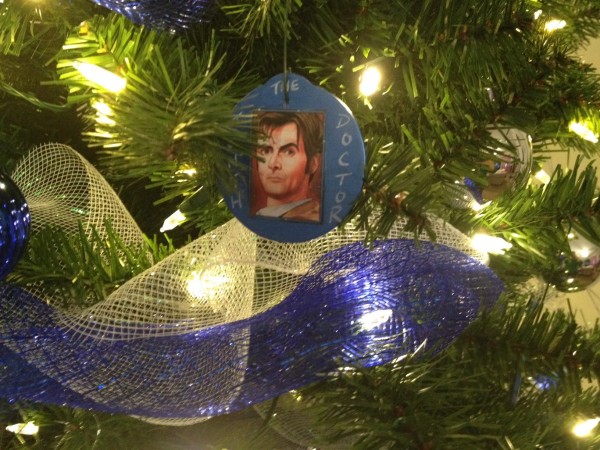
Thirteen Doctor Ornaments
For these, I started with a set of 24 flat wooden disc ornaments from Amazon – you can buy them here – some Tardis-blue paint for 50 cents from Walmart and my best flat 1/2” paintbrush. I opted for a paint with a bit of a sheen to it to create some nice play off the lights. Most of this project was made while I was watching TV or playing board games with my family, so that was nice. Here are the simple directions:
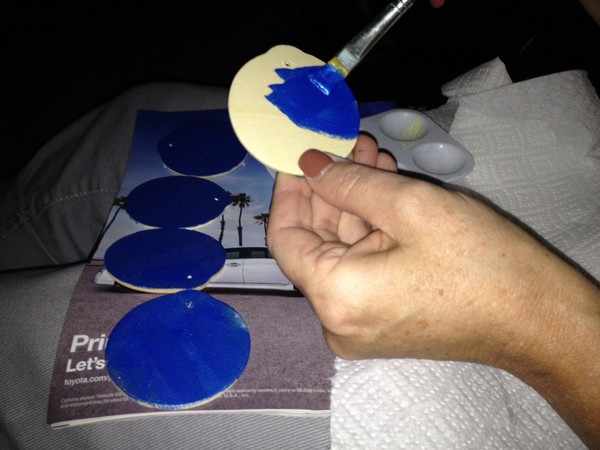
#1 I painted all the blue discs on one side and laid them out on wax paper – paper towels sticks to paint and is a hassle.
#2 I did many nice, light thin coats so they would dry fast. With 24 to work with, I could almost paint non-stop while the others dried.
#3 I did about four thin coats to get all of the grain covered then had to do a few more touch-ups on the side where the discs were more porous.
#4 I went online and found a cool set of sketches of all the doctors and sized them in Photoshop to fit my discs (without covering the pre-drilled hole). I printed and cut those out.
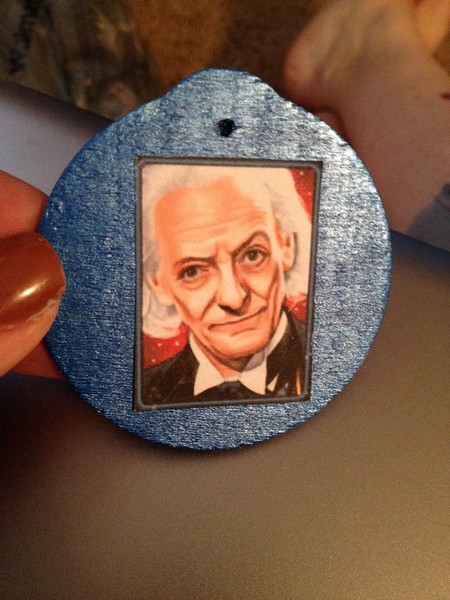
#5 I used a standard school glue stick – light thin coating to avoid lumps and adhered the pictures.
#6 I next labeled each of the Doctors using a white paint pen I already owned. If you have a steady hand and a pinpoint brush, you could just paint these on.
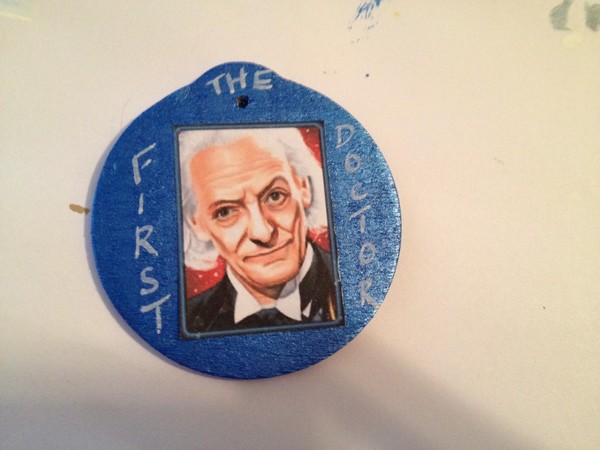
#7 I listed which number Doctor it was on the front and once that dried, on the back, I did the actor’s name and the years he portrayed the role.
#8 I went back to the front and brushed a thin water/glue mixture onto it and let it dry, then brushed on a second coat. This protects the paper image from moisture, scrapes and fading.
Various Other Who-Themed Ornaments
The Doctors took up 13 of my discs, so I had 11 left to play with.
#1 Beginning with the blue discs I already painted, I glued images I found online with a thin layer of adhesive. These were a cyberman and a weeping angel among others.
#2 I coated these with a thin layer of my water/glue mix, let dry then applied another.
#3 I then decided to do a bow tie one and used my white paint pen to add “bow ties are cool.”
#4 I used my paint pen and did a “hello sweetie” one as well.
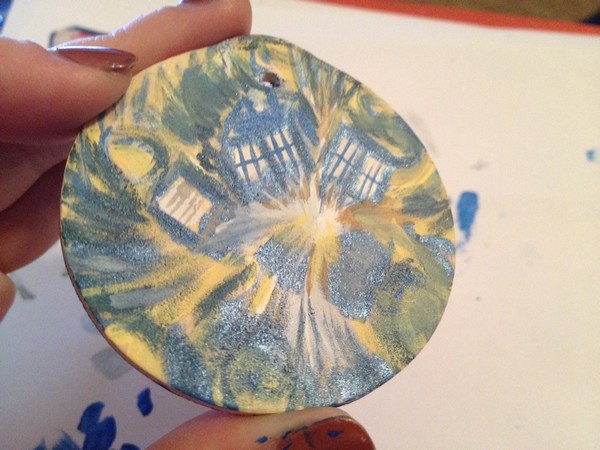
#5 Then I decided to get really artsy and paint an exploding Tardis one. This one I was worried about since I’m no Van Gogh, but I think it came out very nice.
I ended up with about four discs left over but decided not to sweat it about using them all.
Weeping Angel Tree Topper
I was fully committed to having a Weeping Angel atop my tree but I left this til later and was worried it wouldn’t come out right. This project is a matter of patience and the right weather. You need weather warmer than 50 degrees F to spray paint. Luckily, I caught a warm weekend and made it happen.
#1 I chose the plainest angel I could – the big challenge was finding one that didn’t have her hands holding a light, and whose arms were pose-able.
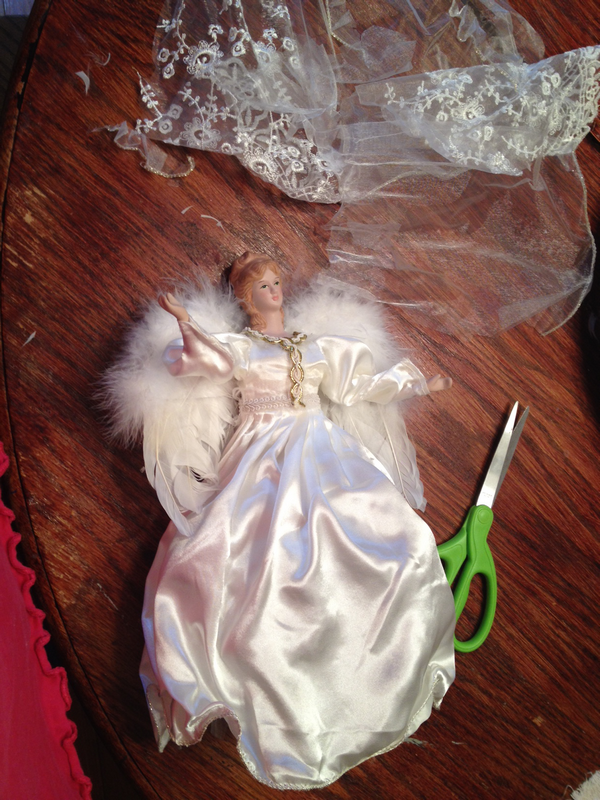
#2 I scored a cool 10” one at Hobby Lobby and used a 40% coupon off their website to get it super-cheap.
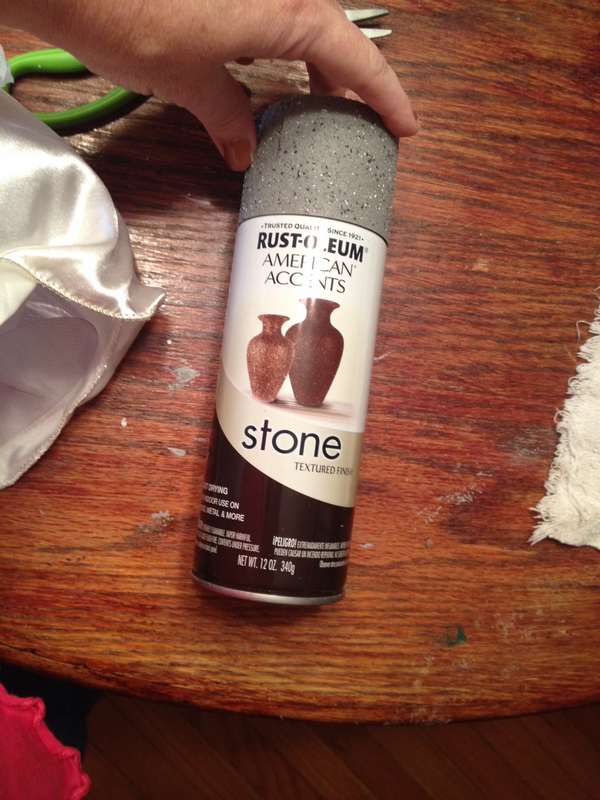
#3 From Walmart, I bought a can of Rustoleum American Accents stone-looking spray paint that cost about $6. The color I used was “gray stone”. You can get it at most big box home improvement stores as well. See product link here.
#4 To prep the angel, I cut off her over-skirt that was sheer and some ruffles on her blouse. I also cut the extra lining off her sleeves. Since weeping angels are in Greek-looking shroud deals, I made it as plain as I could.
#5 I grabbed some newspaper, hit the porch and put on a coat. It says you can re-coat every 15 minutes, but I think that’s humidity driven. Your first layer needs to be pretty dry or you’ll have a mess.
#6 This paint is thick and gloppy because of the flecks, so shake for at least a minute, hold it at least a foot away and do light coats.
#7 I sprayed over a period of four days. The first coat will not be impressive. You will think you made a mistake and that it’s not going to work. It will. Press on! Coat after coat, the happy tree angel began to disappear and the sinister weeping angel I was envisioning began to show up.

#8 One of the big challenges was the hands and face – they took extra coats to cover – I could have sanded but worried I’d lop off a finger or nose.
#9 Another challenge was the skirt. The skirt was wire rimmed at the bottom and it fell in folds all around. The first layers covered the outlying areas and then I had to rearrange the dress by stretching the wired bottom to expose more unpainted areas.
#10 Also, spread the arms wide to spray them reposition to catch all the white areas. The skirt took small squirts here and there to get it completely done.
#11 My angel had white feathered wings. I left them alone at first but after the first go round with spray, it was clear I needed to trim them down. I cut the fluff down to the stiffer area. Yours may not need this step.
#12 Also, this paint smells pretty funky – not like regular spray paint. A light rain came up and I had to bring her inside and it smelled up my kitchen but as it dried, the smell evaporated.
#13 Once she was all done, I used super glue to glue her hands over her eyes to make her a true weeping angel. Once this was done, I then did one more round of touch-ups for angles I couldn’t see until her hands were fixed in the proper position and some paint I knocked off gluing them.
Other Store-Bought Ornaments and Items
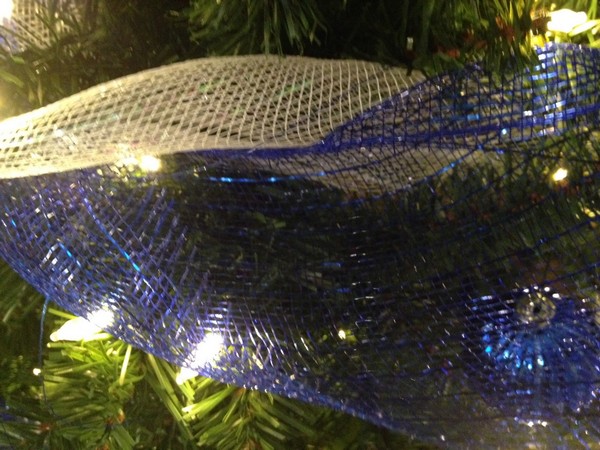
Garland – Initially, I had wanted traditional tinsel garland, but Walmart got cleaned out on Black Friday. I couldn’t even find blue and white garland online and was ready to call quits on my tree until next year. But then I saw rolls of mesh in the blue and white I wanted. They were 21” wide rolls and 30′ long each. They were on sale for $3 each, so that was a score.

#1 I decided to cut them in thirds longwise since I didn’t know how much it would take to surround the tree and get the wavy look I wanted.
#2 I measured out 7” and what was nice was there were glittery threads in it so I could cut without having to constantly measure.
#3 I ended up needed nearly 60′ or two of the three strips I cut to go all around the tree. I have plenty left and am considering a wreath or mantle decoration for next year.
Snowflake Ornaments – I saw a great pack of plastic snowflakes before Black Friday at the Dollar Tree but when I went back for them, they weren’t there. Instead, I got more ethereal looking flakes at a four for $1 price so I bought three sets giving me 12 snowflakes in all.
Ball Ornaments – I also hit Garden Ridge while shopping and bought a 50 pack of really pretty ornaments that were all blue, shiny blue, glittery, shiny silver and matte silver. These are normally $10 for the cylinder tube packed full, but they were on sale and I got them for about $7.
Assembling the Tree
We usually cut a live tree, but we decided to look for an artificial tree because it was more eco-friendly. We found a great weekend sale at Sam’s Club and got a $150 tree for $79. I like it because it’s tall and thin – 7′ tall and pre-lit. It takes up so much less room than our usual live Frasier fir.
Because it was pre-lit, that saved me 40 minutes of tangles, scratches and cursing at strings of half-working lights. I did not count the tree in with my $50 overall project cost because I was planning on buying the tree anyway. The project costs also did not include my ornament hangers that I already had.
#1 The mesh went up first. I found I couldn’t put the blue and white up at the same time – it was unmanageable and when I tried to twist them, it looked icky.
#2 I started with the white and wound it from the bottom up until I ran out the first 30 foot strip I had cut. Then I started from the top down to meet in the middle and had to trim about a foot or so off. I did lots of curves to give it a lot of texture.
#3 I repeated the process with the blue mesh then went back and tucked in raw edges, snipped loose threads that came off from the cutting process and adjusted the curves to perfect them and give a fluid look.
#4 Next I put up my store-bought ball ornaments and tried to arrange them so they were randomized and there weren’t any clumps of similar colored ornaments together.
#5 Next, I put up my handmade blue discs starting with the Doctors to make sure there were Doctors all over and one could be seen from every aspect. Then I added my other disc ornaments.
#6 Once these were done, I added the 12 snowflakes – all evenly spaced (I’m an OCD symmetry gal).
#7 If I didn’t have a cat, I would have added silver and or blue icicles for more shimmer, but since those are cat killers, I opted out.
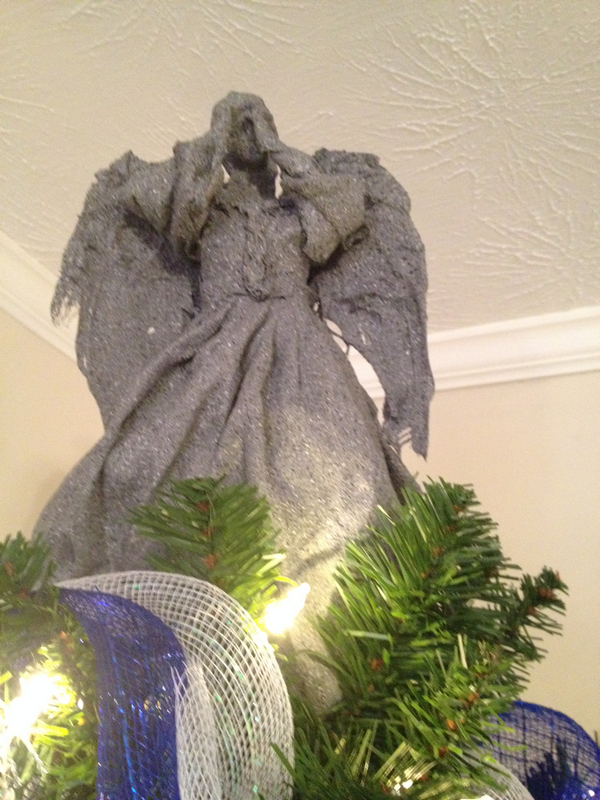
#8 Finally, the coup de grace was my weeping angel that I’m very pleased with. She went on top and voila – I was done! A side note is that the super glue did not hold her hands in place like I wanted so I’m going to epoxy her hands over her eyes before storing her away.
Total Project Cost
All told, I spent about $47 by shopping sales and using coupons. The labor was maybe 5-6 hours, but none of it, except for the spray painting and assembly of the tree, was something I had to devote myself to 100% – I was able to do it while we watched TV or played board games. Below are the total costs of the project:
Flat disc ornaments $12
Blue paint $.50
Mesh garland $6
Angel $12
Ball ornaments $7.50
Spray paint $6
Snowflakes $3
______________________
Total cost $47
My son is thrilled with our Doctor Who tree and I’ve received loads of compliments on it! The great thing about this project is you don’t need a lot of artistic skill or a lot of money to do it. If you have any questions about how I made any of the parts, please ask in the comments and I’ll answer with any details I can provide.
